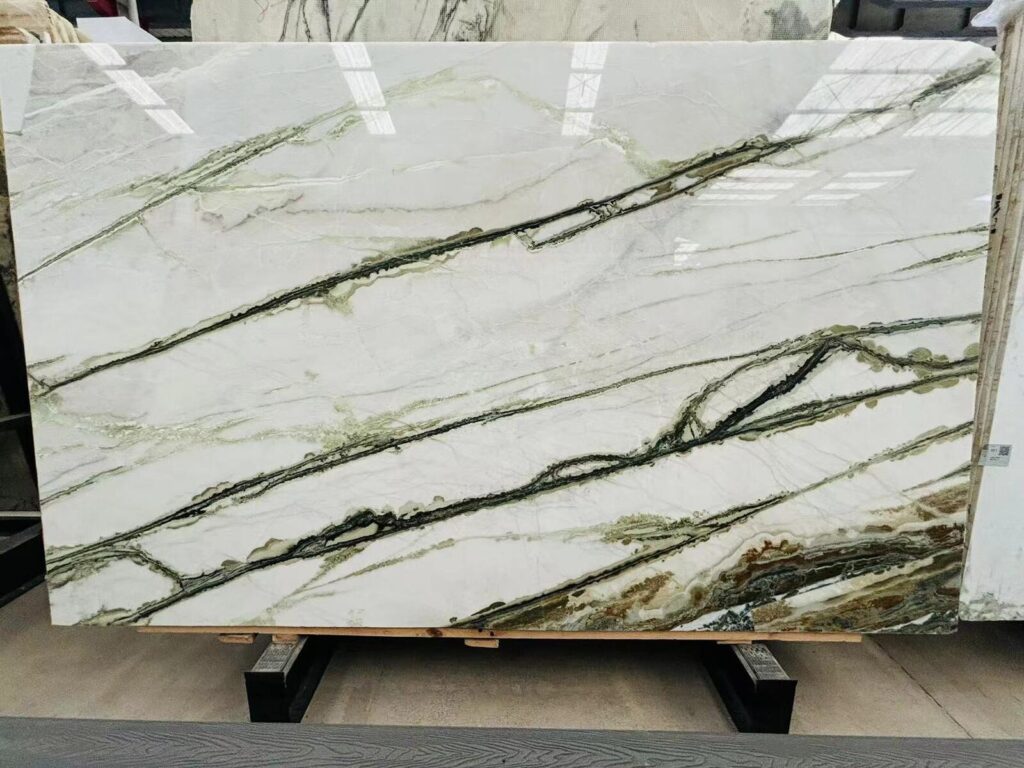


Краткое резюмеAnnotated photos can make a Quartzite fabrication brief much easier to understand when they point to a specific physical slab, piece, edge, seam, opening, pattern feature, or interface. Their job is to communicate visual intent and focus attention—not to replace the current fabrication drawing, verified dimensions, manufacturer cutout information, slab layout, or other controlling technical documents. A useful photo brief normally combines a master context image with a small number of targeted detail images, stable piece IDs, simple arrows or highlighted zones, a reference to the current drawing revision, and short comments that distinguish instructions from questions. The fabricator should be able to understand what the photo is showing, which project component it refers to, what decision is requested, and what still requires drawing, template, slab-layout, or technical confirmation.
A Quartzite project can become difficult to explain surprisingly quickly.
The designer wants one mineral feature closer to the center of an island.
The client wants a darker area moved away from the sink.
A waterfall end should turn in one direction rather than another.
The side splash needs to come from a quieter part of the slab.
One edge is visible; another is against a wall.
A repair is acceptable in one position but not beside a narrow cutout.
Trying to explain all of this in a message can produce sentences such as:
“Use the piece on the left, but rotate it, and keep that darker line toward the back, except the part near the sink should move slightly right.”
A marked-up photograph can make that instruction much easier to understand.
But it can also create a new problem if the factory begins treating the photograph as the fabrication drawing.
This is the real issue behind How to Brief a Quartzite Fabricator Using Annotated Photos.
The strongest workflow gives each document a clear job:
Photo → Shows context and visual intent.
Annotation → Points to the exact question or priority.
Drawing → Controls geometry and current fabrication information.
Slab Layout → Connects finished pieces to actual Natural Quartzite.
Fabricator Response → Confirms what can be executed and what still needs clarification.
An annotated photograph is most valuable when one project party can see something that is difficult to describe with words alone.
A photograph can immediately show:
A simple arrow, outline, circle, shaded area, or short numbered callout can tell the fabricator:
“This is the feature we are discussing.”
That is much more useful than sending the same photograph with a separate message saying:
“Look near the upper-left part.”
A photograph can show approximately where a sink sits.
It should not automatically define the sink opening.
A photograph can show the desired waterfall direction.
It should not automatically define the mitre geometry.
A photograph can show which edge is visible.
It should not automatically define an edge profile dimension.
Annotated-Photo Rule
Use the photo to say where to look и what matters. Use the current drawing, verified template, manufacturer information, or approved fabrication document to define what will actually be cut.
A useful fabrication brief does not need dozens of screenshots.
It needs enough photographs to move from the whole project to the exact detail without losing context.
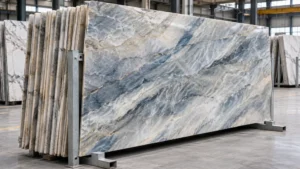
Start with one image that answers:
What part of the project are we talking about?
This might show:
The purpose is orientation.
A reviewer should understand where every later detail image belongs.
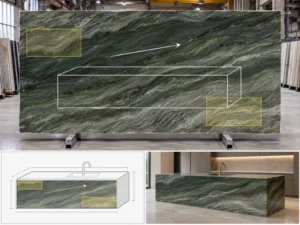
Use this image when the instruction concerns Natural Quartzite pattern placement.
Он может показать:
For directional Quartzite, this image should remain connected to the actual slab and piece ID.
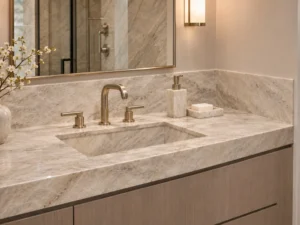
Use a closer image for one local issue such as:
The image should still make it possible to identify which finished piece is being discussed.
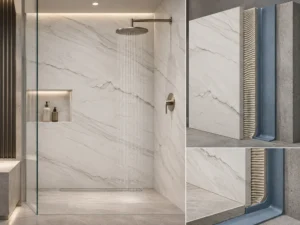
This image exists only when something requires special attention.
Например:
This fourth image is not mandatory.
If there is no exceptional interface, do not manufacture one just to complete a template.
Photo-Pack Logic
Master View → Material / Layout View → Fabrication Detail → Exception Only If Needed. More images are useful only when they answer an additional project question.
A good marked-up photo should be understandable even if the person viewing it did not participate in the original conversation.
The annotation system does not need to be complicated.

Use stable references such as:
I-01 — Island top
WF-L — Left waterfall
V-01 — Vanity top
W-06 — Wall panel
The exact naming system can vary.
Consistency matters more than the code itself.
An arrow can show:
But its meaning should be stated.
Связанные материалы Условные обозначения направления кварцитовых жил для рабочих чертежей guide explains why an arrow should work together with piece IDs, visible faces, seams, and actual slab layouts rather than being treated as a universal symbol.
A transparent outline or shaded area can identify:
Do not use a large coloured circle if the actual question concerns a small, precise condition.
One of the most useful annotations is not an instruction.
It is a question.
Например:
“Can this edge remain from this slab position?”
“Please confirm whether this feature affects the sink-zone layout.”
“Can this return be fabricated from the same piece?”
This tells the fabricator that technical judgment is being requested rather than dictated.
| Annotation | Useful Meaning | Do Not Assume |
| Идентификатор детали | Identifies the component being discussed | That the photo itself defines dimensions |
| Arrow | Shows a defined direction or visual movement | That every viewer interprets the arrow the same way |
| Outline / Zone | Shows where a visual decision applies | That the drawn outline is a fabrication template |
| Question Callout | Requests fabricator review | That the buyer has already specified the technical solution |
Annotated photographs are especially useful for visual and relational information.
A slab photograph can show:
“Keep this large mineral area inside the island.”
or:
“Prefer the quieter zone for the backsplash.”
That instruction can then be tested against the actual cutting layout.

For returns, waterfall ends, wall panels, furniture, and other multi-face pieces, the photo can clearly identify which surface matters visually.
A photograph can explain why one proposed seam feels visually disruptive.
The project can then ask the fabricator to return a revised layout rather than trying to design the technical seam directly on a screenshot.
An annotated site or rendering photograph can mark:
VISIBLE EDGE
versus:
WALL SIDE / NON-VISIBLE EDGE.
The current fabrication drawing should still define the approved edge detail.
If a particular condition requires review, mark its location relative to the proposed finished piece.
Location is often more useful than a close-up alone.
A feature outside the finished component asks a different question from the same feature beside a cutout or narrow remaining stone zone.
Site photographs can show:
The photograph should supplement the project geometry rather than replace measured information.
This is the most important limit of the method.
A sink photograph can show which sink is being discussed.
It cannot reliably define the stone opening.
The exact model, current manufacturer information, accepted template, approved CAD information, or another agreed fabrication basis should control irreversible cutting.
The Вырезы для раковин из кварцита: почему угловые детали требуют одобрения производителя guide makes this distinction explicit: a product photograph or approximate dimension should not become the fabrication geometry for a Natural Quartzite opening.

A dimension drawn over a perspective photograph can be useful for discussion.
It can also be misleading if the photo is not orthographic or scaled.
Use the current drawing, field measurement, template, verified CAD, or other approved basis for final dimensions.
A photograph can communicate:
“We want a visually softer edge like this.”
The production document should still define the actual approved profile.
An annotated photo can show:
“This area is unsupported in the current site photograph.”
It should not automatically prescribe a structural solution.
A photograph can identify an interface.
It cannot substitute for the responsible technical documentation governing:
Photo vs DrawingAnnotated Photo: “This is the visible edge we care about.”
Fabrication Drawing: “This is the current approved edge geometry.”
Annotated Photo: “Keep this mineral feature away from the sink zone if feasible.”
Fabrication Drawing / Layout: “This is the verified sink opening and actual proposed cutting position.”
The biggest risk with annotated photos is not poor annotation.
It is an old screenshot remaining active after the project changes.
A photo package should identify the current basis, for example:
Drawing R04
Layout L03
Slab TM-231
Piece I-01
The exact format can vary.
The relationship should not.
Предположим:
R02 shows the sink 100 mm farther left.
R03 changes the sink model.
R04 contains the approved current geometry.
If somebody later sends a beautifully annotated R02 screenshot, the clarity of the arrows does not make the geometry current.
A comment such as:
“Prefer this lighter slab area for the island.”
may be a visual instruction.
A comment such as:
“Move the sink here.”
changes project geometry and should return to the current drawing workflow.
A useful annotated-photo comment can say:
“Please move the proposed seam away from this focal mineral feature if technically feasible and return a revised layout for approval.”
That keeps the buyer’s visual intent clear while allowing the fabricator to revise the controlled document.
The Формы утверждения проекта из кварцитов: что на самом деле подписывает клиент? guide uses the same principle: visual approval should attach to identified slabs, a specific layout revision, piece positions, orientation, and stated scope rather than to an undefined image.
A good photo brief should create a two-way technical conversation.
Do not end every marked-up image with:
“Please do this.”
Some instructions need confirmation.
PROJECT / AREA
Кухонный остров
МАТЕРИАЛ
Madeirus Quartzite — identified project slab
CURRENT BASIS
Drawing R04 + Layout L03
PHOTO REFERENCE
Master View A / Detail 02
REQUEST
Keep the main directional movement running along the island. Please review whether the marked darker condition can remain outside the sink-side narrow zone while preserving acceptable slab yield.
RETURN REQUIRED
Revised slab layout or fabricator comment identifying any conflict before cutting release.
This structure does several things at once.
It tells the factory:
Depending on the issue, the appropriate response may be:
The response type should match the question.

If the photo request results in a revised drawing, the new drawing should become the current basis.
Do not continue circulating the old annotated image as though it remains the production authority.
The same visual priority can be checked after fabrication.
Например:
Brief: keep main movement along island.
Approved Layout: I-01 positioned accordingly.
QC: photograph I-01 in full view and confirm orientation before packing.
This produces a useful communication chain:
Design Intent → Annotated Photo → Current Drawing / Layout → Fabricator Response → Approval → Fabrication → QC Evidence.
No. Annotated photos are useful for communicating visual intent, context, orientation, visible edges, slab features and review questions. Final dimensions, openings, seams, edge geometry and other fabrication information should remain tied to the current approved drawing, template, verified CAD, manufacturer information or other agreed fabrication basis.
Usually the master context image. It allows the fabricator to understand where later detail photos belong. A close-up can show an important feature, but without context it may be unclear which slab, piece, edge, seam or installed location the comment refers to.
Dimensions can be added for discussion when their purpose is clear, but a perspective photograph should not automatically become the final dimensional fabrication basis. Critical dimensions should be confirmed through the current drawing, field measurement, template, verified CAD or other project-approved source.
Its meaning should be defined for the project. It may indicate dominant visual movement, piece orientation, installed direction or another intended relationship. Do not assume every fabricator or designer interprets an isolated arrow in the same way.
A photograph can identify the sink location or highlight a visual concern, but irreversible cutout geometry should use the exact sink information and current fabrication basis accepted for the project. A product photo or approximate outline is not a reliable substitute for the actual cutout definition.
Check whether the change affects anything shown or requested in the photographs. If dimensions, openings, seams, visible faces, orientation, slab allocation or other relevant conditions change, update or supersede the affected photo brief rather than allowing the old screenshot to remain active beside the new drawing.
Send Josh the Natural Quartzite material, current slab or board references, current drawing and layout revisions, finished dimensions, quantity, finish, piece IDs, annotated master and detail photographs, exact visual priorities, confirmed fixture or equipment information where openings are involved, and delivery destination. State which comments are instructions, which are preferences, which require fabricator review, and what return document or photograph you need before fabrication approval.
Fabrication Brief Rule
A strong annotated-photo brief should let the fabricator understand the project without forcing the photograph to carry information it cannot reliably control. Show the complete context first, identify the exact piece or slab, mark the visual priority clearly, connect the image to the current drawing or layout revision, and state what response is required. When the request changes fabrication geometry, move that decision back into the controlling drawing rather than leaving it trapped inside a screenshot.
For custom Natural Quartzite fabrication, HRST STONE can coordinate current slab photographs, annotated review images, CAD and shop drawings, slab layouts, piece IDs, pattern orientation, seams, sink and cooktop information, visible edges, dry-lay photography, fabrication QC, packing references and project approval records within the confirmed stone scope. Send Josh the current drawings together with annotated images so visual comments can be connected to the correct slab, piece and revision before irreversible fabrication.