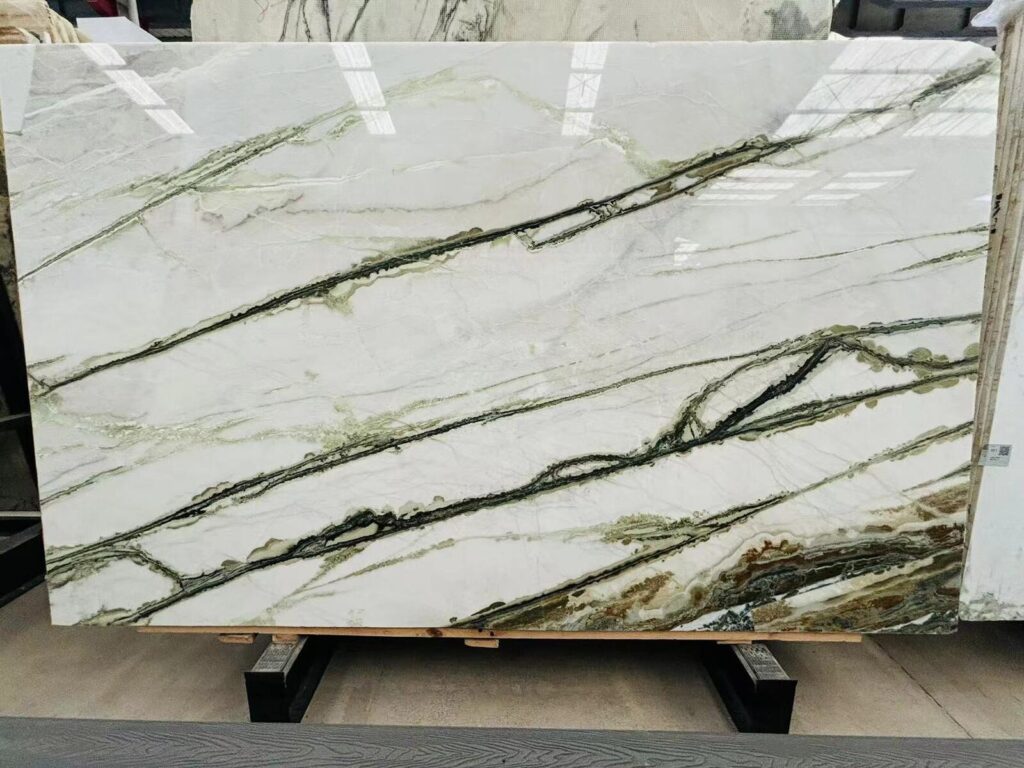

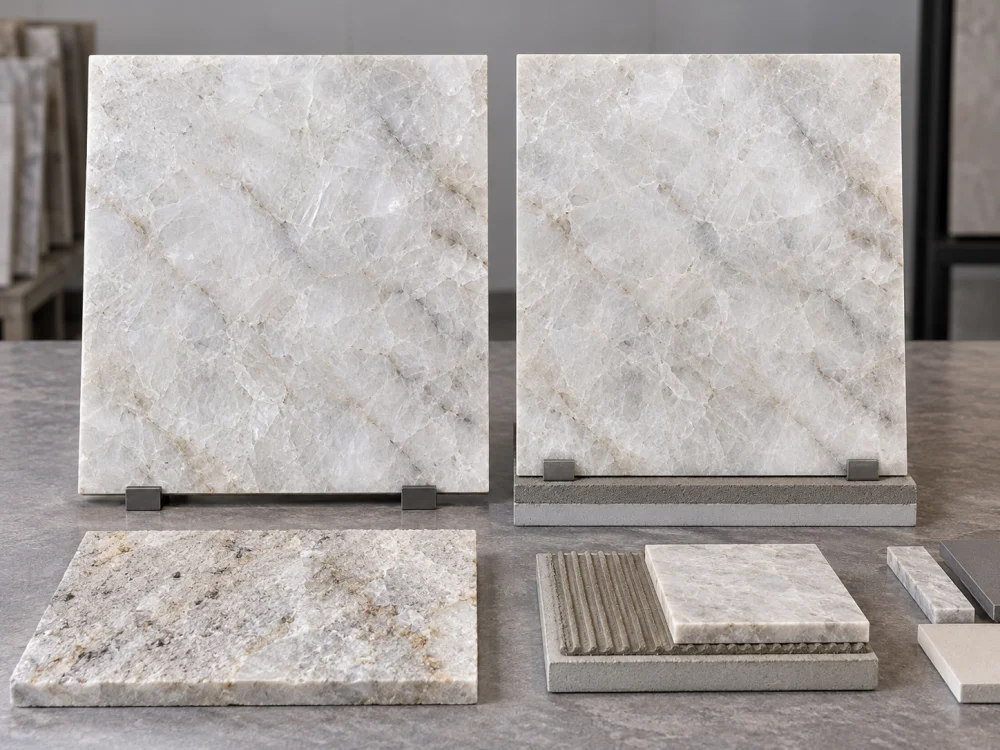
ملخص سريعQuartzite Adhesive Mock-Ups should test the complete proposed installation interface before production begins. Use the actual Natural Quartzite or a representative project piece, preserve the relevant back condition, apply the candidate adhesive and preparation specified for the project, use a representative substrate, and keep an unbonded control reference from the same stone where practical. Review the stone face before bonding, during the curing and drying process, and after the agreed final review condition. Record darker, lighter, warmer, cooler, cloudy, edge-related, or sheen-related changes without automatically calling them stains. Also record adhesive colour, coverage, backing or resin, substrate, primer or membrane, moisture condition, cure stage, lighting, and sample orientation. A successful appearance mock-up does not automatically approve bond strength, structural support, mechanical fixing, waterproofing, or every later slab.
A pale Natural Quartzite panel looks correct before installation.
The stone is bonded to a substrate.
The next day, part of the face appears darker.
One edge looks slightly more saturated than the centre.
A crystal-rich zone appears greyer than it did before bonding.
Several days later, some of the colour difference becomes weaker.
Another area remains visibly changed.
What happened?
Was the adhesive too dark?
Did installation moisture temporarily deepen the stone?
Did the actual stone react differently from the sample?
Is the visible difference coming from the adhesive, substrate moisture, existing backing, a treatment already present on the stone, or another condition?
This is the practical reason for Quartzite Adhesive Mock-Ups: Testing Discoloration Before Installation.
A mock-up should not be built merely to prove that an adhesive can hold a piece of stone in place.
For visually sensitive Natural Quartzite, it can also answer a second question:
Does the complete proposed installation system create an unacceptable visible change on the stone face?
The first mistake is calling every visible change a stain.
A mock-up may show several different observations.
An area may appear darker than the unbonded control.
This may be uniform across the sample, concentrated near an edge, visible only over certain mineral zones, or present as irregular patches.
A bonded zone may also appear lighter, milkier, greyer, or less visually deep than the original stone reference.
This is particularly important on pale Natural Quartzite where small changes can be noticeable.
The stone may appear:
Describe what is visible before deciding why it happened.
A visual difference may actually be related to reflected light rather than colour.
Ask separately:
Has the colour changed?
و:
Does the surface reflect light differently?
Some samples may show a darker or otherwise different band near a perimeter or joint while the centre appears relatively unchanged.
Record the geometry of the visible condition.
Do not assign a mechanism from appearance alone.
The related الحفر مقابل التلطيخ على عينة من الكوارتزيت: كيفية وصف المشكلة guide uses the same principle: first record colour, sheen, boundary, texture, viewing behaviour, moisture condition, and exposure history before naming the cause.
Observation Rule
Darker ≠ Automatically Stained. Cloudy ≠ Automatically Moisture Damage. Edge Darkening ≠ Automatically Adhesive Failure. First record the visible change, then investigate the mechanism.
A mock-up becomes difficult to interpret if there is nothing to compare it with.
Where practical, prepare a control piece from the same Natural Quartzite selection.
The strongest comparison is often:
Unbonded Control ↔ Bonded Mock-Up
rather than:
Bonded Mock-Up ↔ Old Mobile-Phone Photograph.
Natural Quartzite varies.
Two samples from unrelated parts of a slab may already have different colour, crystal density, veining, or translucency before adhesive is applied.
For a colour-sensitive test, adjacent or otherwise representative pieces can reduce unrelated variables.
The control and test piece should use the same intended surface finish where practical.
A polished control should not silently be compared with a honed bonded sample.
If the project stone has documented:
record it.
The control is useful only when the team understands what it represents.
Take the baseline photographs before adhesive is applied.
A useful set includes:
Baseline Sequence
Identify Stone → Match Finish → Photograph Face → Photograph Back → Record Treatments → Preserve Unbonded Control → Begin Adhesive Test.
A discoloration test made with the wrong backing or wrong substrate can produce an answer to the wrong question.
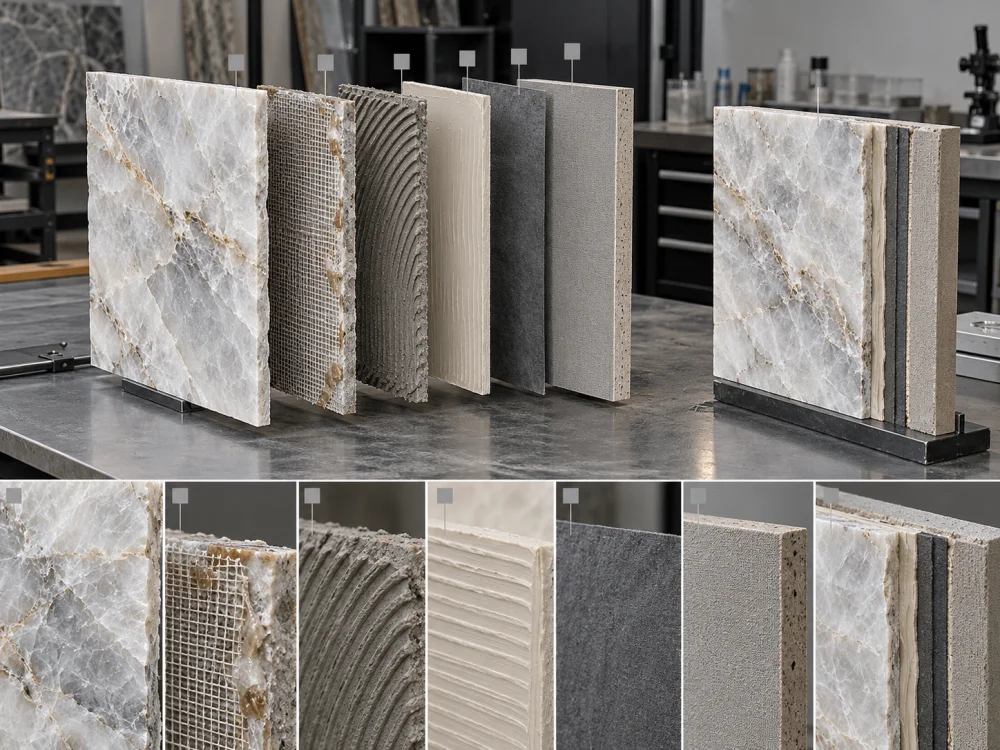
The complete installation interface matters.
The back of the Natural Quartzite may be:
If the production panel is mesh-backed, a test performed only on freshly exposed bare Quartzite does not reproduce the same interface.
ال Mesh-Backed Quartzite Slabs: What Installers Should Know Before Bonding guide explains why the actual bonding surface must be identified before the adhesive system is approved.
If the approved installation system requires a particular preparation, the mock-up should reproduce it as closely as practical.
Do not sand, grind, prime, clean, or otherwise alter the test surface in a way that production will not follow.
The other side of the bond also matters.
The test should identify the actual or representative receiving condition, such as the project-approved:
A mock-up bonded to one substrate does not automatically approve a different substrate.
If the real installation includes a primer, membrane, waterproofing layer, or another system component between adhesive and structural substrate, include it where the mock-up is intended to represent that assembly.
The bond stack may therefore be:
Quartzite → Existing Back Treatment → Prepared Surface → Adhesive → Primer / Membrane → Substrate.
A horizontal floor sample and a large vertical wall panel do not necessarily reproduce the same installation condition.
Where orientation affects application, coverage, movement, or visual review, record the intended project orientation.
Adhesive is normally hidden after installation.
That does not always mean its colour or distribution is visually irrelevant.
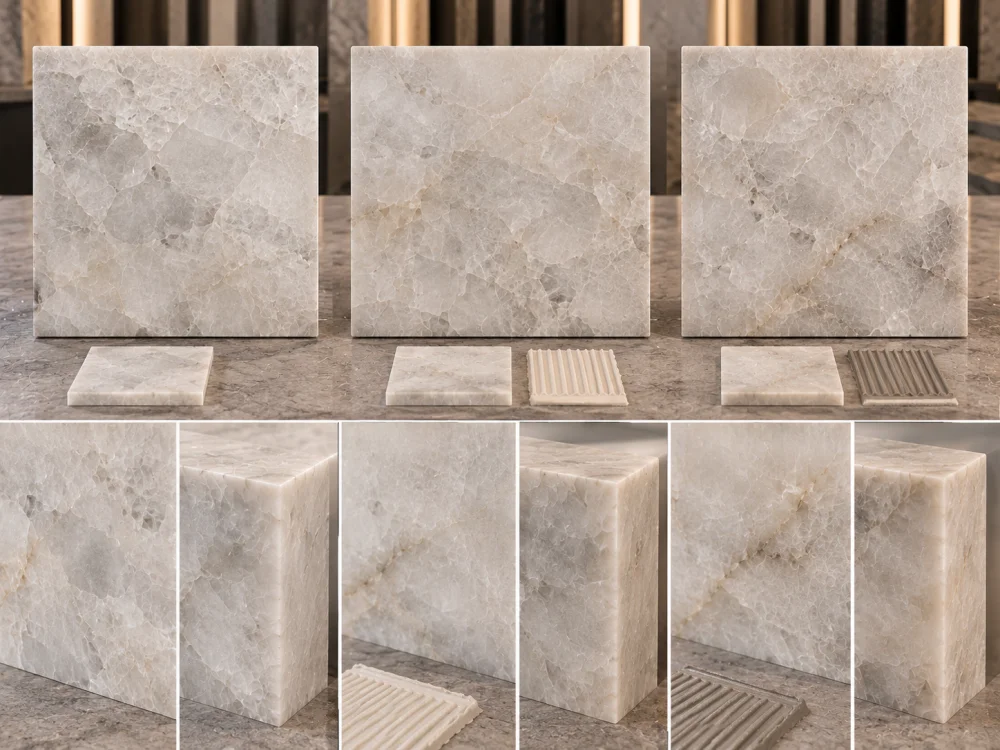
Pale Natural Quartzite can contain zones with different optical depth.
Some crystal-rich areas may visually transmit or scatter light differently from more opaque mineral fields.
Where the actual stone makes adhesive show-through or shadowing a concern, test it.
Do not assume that every Natural Quartzite is translucent.
Some installation-product manufacturers distinguish between products or colours intended for light-coloured or visually sensitive natural stone.
The responsible installer should follow the current documentation for the candidate product.
If the project is comparing more than one approved candidate system, the mock-up may be organized as:
Control → Candidate A → Candidate B.
Keep the stone, substrate, preparation, application method, and viewing conditions as consistent as practical so the adhesive system remains the principal changed variable.
A very thin smear made only for photography may not represent the production installation.
Likewise, an intentionally excessive adhesive layer may create a condition the actual installation will not use.
The mock-up should follow the proposed installation method and current product guidance for:
White adhesives or mortars are commonly considered for some light-coloured or translucent natural stones because darker material behind the stone may affect appearance.
That does not mean every Quartzite project should automatically use the same white adhesive.
The decision still depends on the actual stone, backing, substrate, environment, installation method, and current adhesive-manufacturer guidance.
موقع معالجات راتنج الكوارتزيت: أسئلة يجب طرحها قبل اختيار المادة اللاصقة guide explains why product choice should begin with the actual bond surface and bond purpose rather than the commercial stone name.
| Mock-Up Variable | What Must Be Recorded |
| كوارتزيت | Sample / slab relationship, finish and relevant mineral zone |
| Back condition | Bare stone, mesh, resin, mixed condition or other prepared surface |
| Adhesive | Exact candidate product, colour and current reference |
| Application | Preparation, coverage and relevant installation method |
| System layers | Primer, membrane or other specified intermediate layer |
| الركيزة | Actual or representative receiving surface |
| بيئة | Orientation, temperature / moisture condition where relevant, and review location |
A bonded sample can change visually while moisture is present and then change again as the installation system cures.
This means one photograph taken shortly after bonding is not enough.
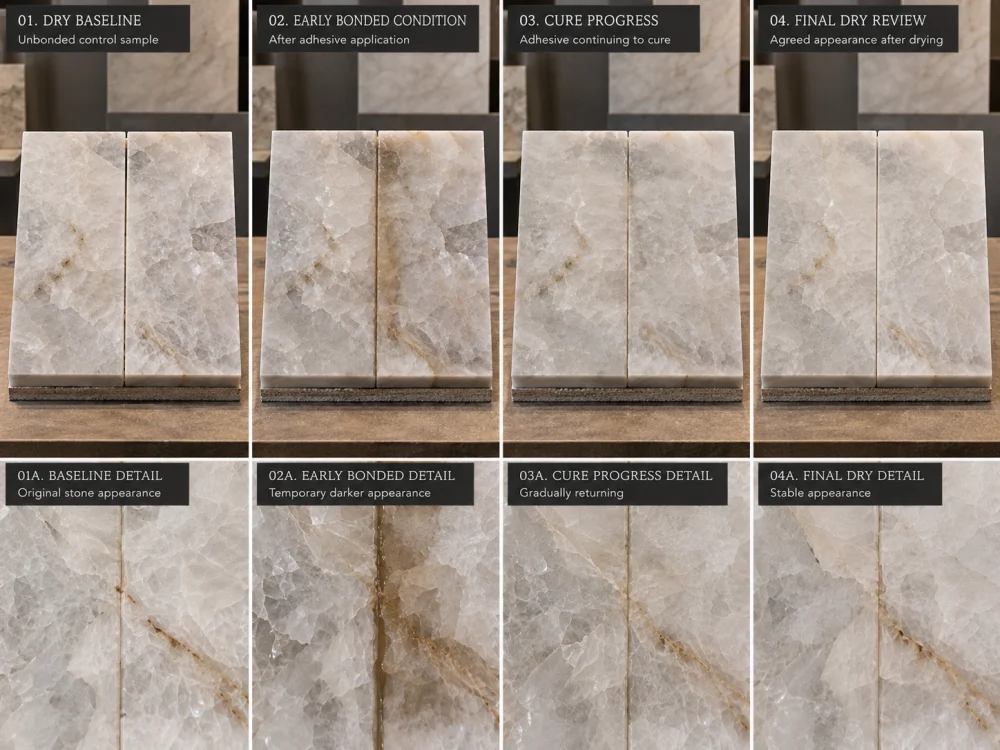
سجل:
After installation begins, the face may appear temporarily different.
If a darker or cloudy zone develops, record it.
Do not immediately classify it as permanent staining.
Continue the comparison according to the curing conditions and timing relevant to the proposed product.
Avoid inventing one universal number of hours or days for every adhesive.
At the final agreed review condition, compare:
Bonded Sample ↔ Unbonded Control.
يجب التحقق من:
A sample photographed under warm evening lighting should not be silently compared with a control photographed under cool daylight.
Use the same or clearly documented viewing conditions.
For every visual review, note:
Dry / Damp / Recently Wiped / Unknown.
Natural stone can appear darker while moisture is present.
The condition during photography matters.
Mock-Up Timeline
Dry Baseline → Bond → Early Observation → Defined Cure Stage → Agreed Dry Final Review → Compare with Control → Record Decision.
One of the main reasons to continue a mock-up through curing and drying is that the first visual change may not be the final one.
A bonded natural-stone sample can look darker while moisture is present within or behind it.
If the appearance gradually returns toward the control as the approved installation system cures and the sample dries, record that sequence.
Do not silently use only the darkest photograph as the final condition.
If a darker, lighter, cloudy, coloured, or edge-related area remains after the agreed dry review condition, record that separately.
The next step is not automatically to declare:
“The adhesive stained the Quartzite.”
The relevant parties may need to consider:
A light-coloured powdery or crystalline surface deposit is a different observation from simple darkening.
Moisture moving through installation materials can transport soluble salts under some conditions.
If a powdery deposit appears, document it rather than grouping it under the word “discoloration.”
Natural stones can contain different minerals.
Water and installation chemistry may be relevant to some stone conditions, but a brown, yellow, grey, or cloudy area does not by itself prove which mineral or chemical process is responsible.
Visual evidence should trigger the appropriate technical review rather than replace it.
One Natural Quartzite sample may contain several zones that do not respond identically.
A small colour difference may be easier to see against a light background than against a darker mineral field.
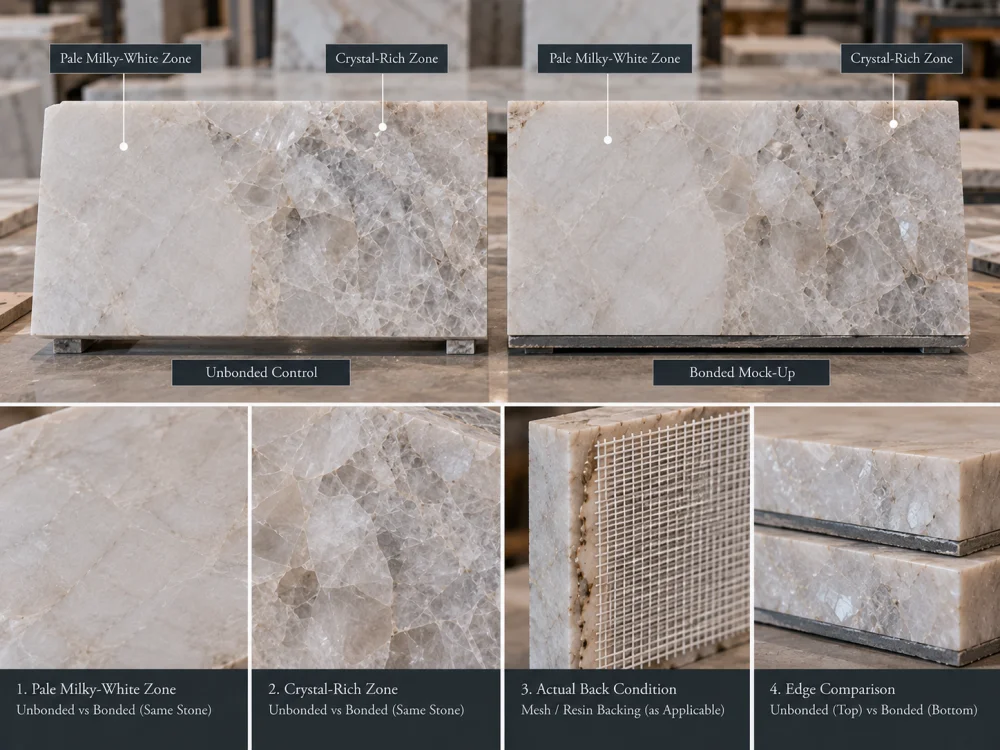
Crystal-rich or partially light-transmitting zones may show underlying colour, shadow, moisture, or interface differences differently from more opaque sections.
Do not assume that this behaviour applies to every Quartzite.
Use the actual selected material.
An existing repair or resin-treated condition introduces another material history.
If the installation adhesive will sit behind that area, include a representative repaired zone in the test when it is visually or technically important.
If the project panel contains mesh and resin, the installation adhesive may not contact Natural Quartzite directly.
That changes both compatibility review and the ability of the mock-up to represent production.
A fabricated panel may include:
If one panel contains materially different bonding surfaces, a single tiny test coupon from only one zone may not answer every installation question.
This distinction should be explicit in the approval record.
Its main purpose may be to review:
A technical bond test may evaluate other questions, depending on the approved system and project specification.
Those can include:
A mock-up can remain visually unchanged and still fail to prove that the complete wall, floor, or panel assembly has adequate technical bond performance.
Likewise, an adhesive can achieve strong attachment while creating an unacceptable visible change in a pale or visually sensitive stone.
Record which question each test answers.
Two Separate Approvalsالموافقة البصرية: Does the bonded Quartzite retain an acceptable appearance after the agreed cure and dry review?
Technical Installation Approval: Is the complete adhesive / backing / substrate / environment system suitable according to the responsible installation design and current product documentation?
A useful record allows the team to reconstruct exactly what was tested.
| عنصر السجل | ما يجب تحديده |
| كوارتزيت | Material, sample ID, slab relationship, finish and mineral zone where relevant |
| الرقابة | Unbonded comparison piece or documented control area |
| Back condition | Bare / mesh / resin / repaired / mixed |
| التحضير | Actual preparation used on test piece |
| Adhesive | Exact candidate product and colour |
| Substrate / system layers | Representative substrate, primer, membrane or other relevant layers |
| Application | Representative method and coverage condition |
| Review stages | Baseline, early observation, cure-stage review and final agreed dry review |
| Visual result | Colour, sheen, cloudiness, edges and comparison with control |
| Approval boundary | Exact condition approved and unresolved technical questions |
Repeat the affected review if:
The purpose is not to create endless testing.
It is to prevent one controlled mock-up from being used as proof for a physically different installation.
The safest approval sequence is:
Actual Quartzite → Baseline Control → Actual Back Condition → Intended Preparation → Candidate Adhesive → Actual System Layers → Representative Substrate → Cure / Dry Review → Visual Approval → Separate Technical Installation Approval → Release.
This sequence avoids several common mistakes:
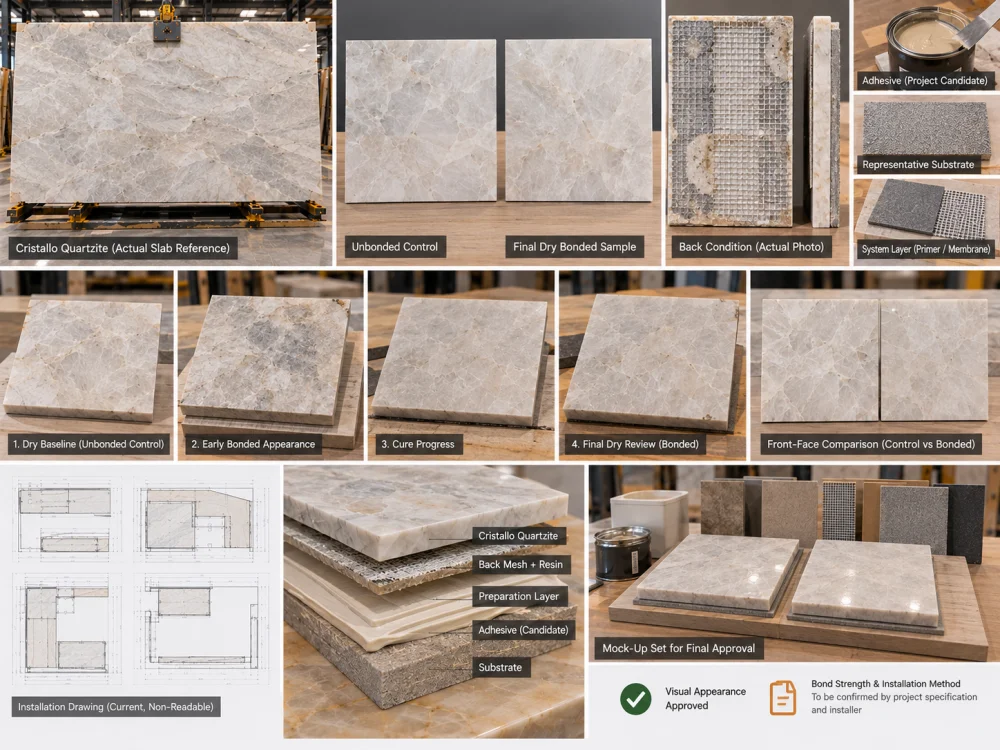
A good adhesive mock-up is therefore not just a sample glued to a board.
It is a controlled record of the real installation interface and the real visual question.
A visible colour change may occur in some stone-and-installation conditions, but appearance alone does not establish the cause. Adhesive colour, installation moisture, substrate moisture, existing backing or resin, soluble materials, natural mineral zones, surface treatments, and other factors may need review. A representative mock-up helps determine what happens with the actual proposed system.
No universal rule should be applied from the stone colour alone. Some adhesive manufacturers recommend white systems for certain light-coloured or translucent natural stones because underlying colour may affect appearance, but the final product choice should follow the actual Quartzite, backing, substrate, environment, installation method, and current manufacturer documentation.
Do not use one universal cure time for every adhesive. Record the dry baseline, early bonded condition, the manufacturer-defined curing stages relevant to the selected product, and the agreed final dry visual review. The candidate adhesive’s current technical documentation should control curing requirements.
Not automatically. Moisture can temporarily make natural stone appear darker. Record the condition and continue the controlled cure and drying review. If the difference remains after the agreed dry condition, document the persistent change and investigate further rather than assigning a cause from one early photograph.
The mock-up should represent the actual bonding surface. If production panels contain mesh, resin, sanded resin, localized reinforcement, or another backing condition, a test performed only on bare stone may not reproduce the installation interface. Confirm the required preparation and adhesive compatibility for the actual backing.
No. A visual mock-up can support an appearance decision, but structural support, bond strength, mechanical fixing, substrate adequacy, waterproofing, movement, exterior loads, and other installation requirements may require separate technical review or testing.
Send Josh the Natural Quartzite material and sample or slab reference, finish, photographs of the front and back, known mesh or resin condition, intended installation location and orientation, substrate information, proposed adhesive product and colour, primer or membrane information where applicable, surface-preparation method, project drawings, quantities, and the specific visual question being tested. Keep one identified control reference where practical and record the mock-up through the agreed curing and dry-review stages.
Adhesive Mock-Up Approval SummaryA Quartzite adhesive mock-up should reproduce the real installation interface closely enough to answer the actual visual question. Keep an identified unbonded control, use the relevant stone and back condition, reproduce the proposed preparation, adhesive, system layers and substrate, and document the face before bonding, during curing, and after the agreed dry final review. Describe visible changes before diagnosing their cause. Keep visual-discoloration approval separate from bond strength, structural support, mechanical fixing, waterproofing, and other installation-system requirements. If the stone, backing, adhesive, substrate, preparation, or installation environment changes materially, repeat the affected review before extending the previous mock-up approval.
For project-based Natural Quartzite wall panels, tiles, feature walls, and other bonded stone components, HRST STONE can coordinate actual slab references, front- and back-surface photographs, visible mesh or resin records, cutting layouts, panel IDs, control samples, mock-up documentation, cured appearance records, fabrication QC, packing, and export documentation according to the confirmed stone scope. Final adhesive selection, substrate preparation, installation method, bond performance, waterproofing, structural support, and mechanical fixing should be confirmed for the actual project by the responsible installer, installation-system manufacturer, designer, engineer, or other qualified project party as applicable.