

Résumé rapideQuartzite Shower Panels should be reviewed as part of a complete wet-area assembly rather than as isolated stone slabs bonded to a wall. The visible Natural Quartzite panel, its actual back surface, installation adhesive, waterproofing membrane or approved wet-area system, substrate, penetrations, panel joints, changes of plane, sealant, support, and drainage details perform different functions and should be coordinated separately. The Quartzite face and any impregnating stone sealer should not be treated as the shower waterproofing layer, and a successful adhesive test does not automatically approve waterproofing, movement accommodation, mechanical support, or sealant compatibility. Before installation, identify the fabricated panel back condition, confirm the current installation-system documentation, map seams and penetrations, review sealant contact with the actual stone finish, and preserve waterproofing continuity behind the visible panel system. Use project-specific mock-ups or compatibility tests where stone appearance, backing, adhesive, membrane, or sealant interaction remains uncertain.
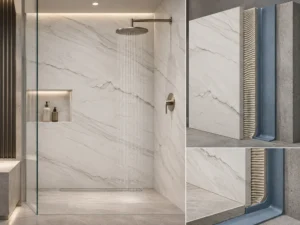
A luxury shower is designed with large Natural Quartzite wall panels.
The full-height stone creates a clean visual surface.
There are very few visible joints.
The slab layout is approved.
The polished or honed finish looks correct.
Then the installation questions begin.
What is on the back of the fabricated panel?
Is there mesh or resin?
What adhesive will actually contact that surface?
Where is the waterproofing layer?
How are penetrations around the shower valve and pipework treated?
What happens at the floor-to-wall junction?
Should a vertical corner be filled with grout or a movement-capable sealant?
Can the proposed sealant stain or darken the edge of the Natural Quartzite?
Does applying stone sealer make the wall waterproof?
These questions belong to different layers of the same installation.
This is the real issue behind Quartzite Shower Panels: Coordinating Stone, Waterproofing, and Sealant.
The correct question is not:
“Which waterproofing product works with Quartzite?”
Elle est :
“How do the selected Quartzite panel, actual back surface, bonding system, waterproofing assembly, substrate, joints, penetrations, and sealants work together without one component being asked to perform another component’s job?”
Large Quartzite panels are the visible architectural finish.
The shower continues behind them.
The Natural Quartzite contributes:
The installation adhesive connects the prepared back of the fabricated panel to the approved receiving assembly.
Its suitability depends on the surfaces it actually contacts.
A shower waterproofing system protects the assembly behind the visible finish from water intrusion.
It may include:
The selected installation manufacturer and responsible project team should define this system.
The complete assembly also depends on the actual receiving construction.
This may include an approved:
Large Natural Quartzite panels also have weight and geometry that may require structural, support, or mechanical-fixing review separate from waterproofing and adhesive compatibility.
Wet-Area Assembly Rule
Quartzite Face → Actual Panel Back → Prepared Bond Surface → Installation Adhesive → Waterproofing / Approved System Layer → Substrate. Movement joints, penetrations, support and sealant details must also remain coordinated with this complete assembly.
Natural Quartzite may be dense and durable.

That does not turn the finished stone surface into the shower’s waterproofing system.
The project may choose Quartzite because of its:
Those qualities do not eliminate the moisture-management requirements behind the panel.
Visible joints help complete the finished surface and may perform movement or sealing functions according to their design.
They should not be used as the only defense against water entering the structure.
A stone treatment may be specified to improve resistance to staining or reduce absorption of particular contaminants.
That is different from creating the waterproof shower enclosure behind the panels.
Do not write:
“Seal the Quartzite and the shower is waterproof.”
The current shower design should show how the approved waterproofing layer is maintained through:
The stone layout should be coordinated around that system rather than forcing the waterproofing design to follow an already-cut decorative panel package.
Function SeparationStone Sealer — stain-management / surface-treatment question.
Installation Sealant — joint / movement / interface question.
Waterproofing Membrane — moisture-management layer protecting the shower assembly.
The stone name alone does not tell the installer what surface will receive the adhesive.
A fabricated panel can contain:
The relevant question becomes:
What surface is the installation adhesive actually bonding to?
The back condition of a full slab may change during:
Inspect the finished panel before packing or installation.
Where back condition affects installation, factory QC can record:
Le Panneaux muraux en quartzite : Vérification de l’interface d’adhérence du support guide explains why a large wall-panel bond should be reviewed as an interface chain rather than by asking only which adhesive is “for Quartzite.”
Visible reinforcement does not by itself prove that it should be ground away.
Removing backing can change the supplied panel condition.
Leaving it untouched should not automatically be assumed correct either.
The approved preparation route should follow the actual back condition and current installation-system guidance.
A product can bond well to one surface without proving that the complete shower assembly is suitable.
Confirm:
Confirm:

If one manufacturer provides the membrane, another the adhesive, and another the joint sealant, confirm that the proposed combination is supported by the responsible technical parties.
Do not assume compatibility merely because each product independently lists “stone” or “wet area” somewhere in its literature.
Some pale or crystal-rich Natural Quartzites may show underlying colour, moisture, shadow, or backing conditions more visibly than opaque areas.
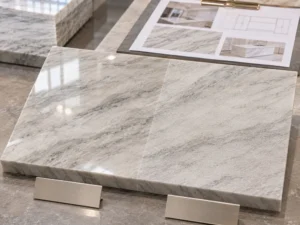
Where this is relevant, a representative mock-up can compare the actual proposed bond stack.
Le Maquettes adhésives en quartzite : essais de décoloration avant la pose guide explains how to separate visual compatibility from bond and installation suitability.
A small mock-up may support a defined question.
It does not automatically approve:
| Question | What It Does Not Automatically Prove |
| Adhesive bonds to panel back | Waterproofing continuity or substrate adequacy |
| Waterproof membrane is approved for shower use | Compatibility with every stone backing or adhesive |
| Sealant is suitable for wet areas | No staining or migration on this specific Natural Quartzite |
| Stone sample looks correct | Full-slab layout, backing condition or wet-area installation method |
| Stone has received an impregnating treatment | Waterproof shower assembly |
Large Quartzite panels reduce the number of visible joints.
They do not remove the need to design joints.
Show where separate stone components meet.
Révision :
A wall-to-wall corner is also a change in plane.
Do not assume it should be treated identically to a flat panel-to-panel seam.
This location combines:
Coordinate it before stone dimensions are released.
Horizontal or near-horizontal shower surfaces introduce drainage and slope requirements in addition to panel alignment.
The responsible shower-system designer and installer should define the approved geometry and waterproofing treatment before the stone is fabricated.
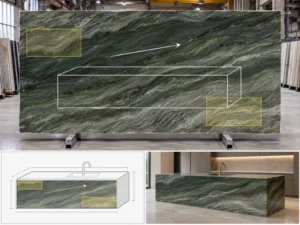
A designer may prefer one uninterrupted vein or crystal field.
That visual objective should not erase a required movement, waterproofing, access, structural, or construction joint.
Stone layout follows the complete assembly—not the other way around.
A shower panel may contain openings for:

The fabricator needs the current:
The installer or waterproofing-system provider needs to define how continuity is maintained around the same penetration.
A decorative escutcheon may cover an opening visually.
That does not prove that the waterproofing layer behind the stone has been treated correctly.
The ideal sequence is:
Fixture Information → Waterproofing Detail → Stone Opening → Panel Layout → Fabrication Approval.
not:
Cut Approximate Hole → Resolve Waterproofing Later.
Sealant may be visually small compared with a full-height Quartzite panel.
Its interaction with the stone can still matter.

First identify whether the sealant is being used at:
Do not test “clear silicone” generically if production will use a specific sealant and primer system.
On pale Natural Quartzite, evaluate whether the proposed sealant or primer causes:
Use a representative offcut or project sample where practical.
The joint may contact:
These interfaces may not behave identically.
The responsible installer should follow the approved movement-joint and shower-system detail rather than treating grout, sealant, adhesive, and waterproofing compound as interchangeable fillers.
Sealant Compatibility Test
Actual Quartzite + Actual Finish / Cut Edge + Proposed Sealant + Required Primer Where Applicable + Representative Joint Geometry → Cure → Visual Review → Approval Within Defined Scope.
Stone-layout drawings often focus on the visible face.
Wet-area drawings need another layer of information.
The project may want a specific vein or crystal direction across:
Bench tops, niche sills, thresholds, and other horizontal shower components need the correct project slope and interface with the waterproofing system.
Do not fabricate them simply as flat decorative shelves unless that is the approved project construction.
The detail where a vertical panel approaches the shower floor should be coordinated with:
Where panels terminate below the ceiling or meet another wall finish, confirm:
A large slab may visually eliminate dozens of grout lines.
The waterproofing assembly behind it still has its own:
A small flat stone sample cannot answer every shower-panel question.
When several interfaces remain uncertain, a representative mock-up can be more useful.
Depending on the project question:
Record exactly what it answers.
Par exemple :
Approved: visual compatibility of Mont Blanc Quartzite with proposed adhesive and membrane stack; proposed sealant shows no unacceptable visible migration on tested polished edge after the stated cure period.
Pending: structural support, field waterproofing inspection, full-panel installation and code requirements.
If the selected shower system or applicable project requirement calls for a water test before stone installation, complete that according to the current approved system and local requirements.
Do not use the installed Quartzite as the method for hiding an unresolved waterproofing question.
Consignez :
This makes the result useful during installation instead of leaving only a final beauty photograph.
Before large Natural Quartzite panels move to final installation, confirm that the physical project still matches the approved basis.
□ Actual Natural Quartzite slabs identified.
□ Final panel IDs and locations confirmed.
□ Full-slab and panel-layout approval complete.
□ Surface finish confirmed.
□ Actual fabricated panel backs photographed.
□ Bare / mesh / resin / mixed back conditions identified.
□ Required back-surface preparation confirmed.
□ Receiving substrate identified.
□ Waterproofing system and current installation documents confirmed by the responsible team.
□ Waterproofing continuity at walls, floor and relevant transitions resolved.
□ Horizontal wet-area surfaces coordinated with required drainage / slope design.
□ Installation adhesive confirmed for the actual bond interfaces.
□ Primer or intermediate system layers confirmed where applicable.
□ Adhesive-discolouration mock-up completed where required.
□ Panel joints and changes of plane mapped.
□ Sealant locations identified.
□ Actual proposed sealant and primer reviewed for Natural Quartzite contact where appearance is sensitive.
□ Penetrations coordinated between fixture, waterproofing and stone drawings.
□ Mechanical support or fixing questions resolved separately where applicable.
□ Movement accommodation resolved by the responsible installation team.
□ Stone sealer, if used, is not being treated as the shower waterproofing system.
□ Water test or waterproofing inspection completed where required by the selected system / project.
□ Installation sequence agreed between stone, waterproofing, plumbing, glazing and other affected trades.
□ Mock-up limitations documented.
□ Responsible project party releases the current assembly for installation.
A useful release chain is:
Selected Quartzite → Final Panel Fabrication → Back-Surface Inspection → Waterproofing System → Bond Compatibility → Joint / Sealant Review → Penetration Review → Support Review → Wet-Area Release → Installation → Final QC.

No. Natural Quartzite is the visible stone finish and should not be treated as the complete shower waterproofing system. The shower assembly should use the project-approved moisture-management and waterproofing method behind or within the stone installation system, including appropriate treatment of seams, corners, penetrations and drainage interfaces.
No. An impregnating stone sealer may be used to improve resistance to staining or other surface exposure depending on the stone and product, but it does not replace the waterproofing membrane or complete wet-area system behind the panels.
That depends on the exact membrane, installation adhesive, substrate, stone back condition, panel dimensions and current manufacturer or installation-system guidance. Identify what the adhesive contacts on both sides and confirm that the selected system supports that complete interface rather than choosing an adhesive only from the stone name.
Not automatically. Visible mesh may be associated with resin or reinforcement, and removing it can alter the supplied panel condition. Leaving it untouched is not automatically acceptable either. Inspect the actual fabricated back and follow the approved preparation route for the selected installation system.
Do not decide from stone appearance alone. Changes of plane, movement joints and other interfaces should follow the current approved shower-system, sealant and movement-joint details for the project. The proposed sealant should also be checked for compatibility with the actual Natural Quartzite where staining or migration is a concern.
Some sealant, primer or adjacent-material combinations can produce migration, darkening or other visual changes on certain stones. Where appearance is sensitive, test the actual proposed sealant system on a representative Quartzite sample or offcut and follow the sealant manufacturer’s current guidance for natural-stone and wet-area use.
Send Josh the proposed Natural Quartzite material, current slab references, shower elevations and panel drawings, finished dimensions, quantity, finish, panel joints, edges, niches, benches and openings, photographs or information showing the expected panel back condition, waterproofing and installation-system information where available, proposed adhesive and sealant references, fixture and penetration details, project location and delivery destination. Identify whether you need full-slab layout, fabricated-back review, adhesive or sealant mock-ups, panel QC, dry lay, packing or another defined stone-supply decision before installation.
Wet-Area Coordination SummaryA Quartzite shower should be approved as an assembly of different layers and interfaces rather than as a beautiful stone surface with waterproofing added later. Keep the visible Natural Quartzite, fabricated back condition, installation adhesive, waterproofing system, substrate, panel joints, penetrations, sealant, support and drainage responsibilities separate but coordinated. Do not use stone sealer as a substitute for waterproofing, do not use one successful adhesive coupon as proof of the complete shower system, and do not assume every joint should receive the same filler. Before installation, inspect the actual fabricated panels, connect them to the current shower drawings and selected installation-system documentation, resolve waterproofing continuity and penetrations, test visually sensitive sealant or adhesive interfaces where necessary, and release only the assembly that has actually been reviewed.
For custom Natural Quartzite shower panels, HRST STONE can coordinate current full-slab photographs, board references, panel CAD and cutting layouts, pattern sequencing, fabricated-back QC, mesh or resin documentation, edge and opening details, dry-lay review, adhesive or sealant appearance mock-ups within the confirmed stone scope, piece identification, protective export packing and fabrication records. Send Josh the material, shower elevations, panel sizes, finish, openings, joint strategy, current installation-system information and destination before final stone fabrication release.